Please notice: This article is more than 3 years oldContent, Source code or links may no longer be correct in the meantime.
December 18, 2020 | 00:05Reading-Time: ca. 7 Min
Revive a Macbook Pro with Debian - Part I
Rescue-Ops before Christmas Eve
What is the worst-case scenario right before Christmas during a Corona Lockdown? Let’s leave zombie apocalypses, too little toilet paper or slow internet connections aside for a moment. Right! A broken laptop.
Exactly such a call for help came to me this afternoon from my own circle of friends. I was asked if I had a spare notebook available shortly. Coincidentally, yes. An old mid-2009 Macbook Pro 13" has been hanging around in the corner for years. Too valuable to be thrown away, technically perfectly okay, but unfortunately no longer supported by Apple. There she is again, the planned obsolescence1.
Where do we come from
The technical specifications are quite solid and it doesn’t need to hide behind current consumer devices:
- 8 GB DDR3 RAM
- Nvidia 9400M GT graphics
- 1 TB SSD
- webcam, SD card reader and 3.5 mm headphone/mic input
- WLAN + Ethernet without adapter
- Illuminated keyboard
- 64Bit Intel Core2 CPU with 2.26 Ghz with 2 cores
Of course the CPU is clearly the weakest spot in the list. However, it is still sufficient for office tasks, for surfing the internet or for enjoyable DVD evenings on the couch in lockdown conditions. Besides details such as the discreet battery power indicator and the white, glowing, stand-by light, the internal slot-in “SuperDrive” DVD is worth mentioning. In stark contrast to current Macbooks, the 58 Wh battery is not glued down in the enclosure and can be easily replaced2. And with just 40 Euros the replacement battery is half the price of the one that recently kept me busy3. Well as soon as I have my unit back I will replace the battery there too. It currently lasts about 1.5 hours, which is no comparison to the 6-7 hours it once lasted in its first life.
Of course, macOS is no longer an option. The last system supported by Apple is macOS 10.11 “El Capitan”4, last updated in 2018. No one should be on internet with this anymore. Of course it will be a current Debian Linux “Buster”5 with a modern GNOME3 interface6.
The requirements from the users’ perspective:
- easy-to-use standard desktop without clutter
- playback of DVDs, music and video files
- up-to-date Libre Office
- access to SMB shares in the local network or remotely via openVPN
- current Mozilla Firefox with uBlock-Origin
This is the guideline I am using for selecting packages and software. The aim is to keep the Linux system as simple and consistent as possible. It is precisely the clutter of many applications for one purpose that tends to scare off the typical Windows or Mac user. I hope that the person considered with this replacement device will experience Linux in a positive fasion. “If you can operate a smartphone, you can manage a Linux desktop” is what I am always saying.
Since I have not really installed a Linux on a Mac before I do expect some unrecognised hardware. So I’ve chosen the “unofficial” Debian non-free firmware7 as installation image and created an EFI-bootable USB stick out of the 4 GB amd64 DVD-ISO8 in /current. Well this might be not be pure Debians’ philosophy, but it works and represents an acceptable compromise between the stability and longevity of a Debian and the support of a wide range of hardware.
Before I forget to mention a short disclaimer: The Mac partition will be deleted in the course of this tutorial. I assume that there is no important data left on the device.
Installation Debian Buster
The boot Menu on a Mac is accessed by simultaneously pressing the Select-Key and Power-On switch. After the start-up chime please select “EFI boot” from the USB drive. The familiar Debian boot menu then appears.
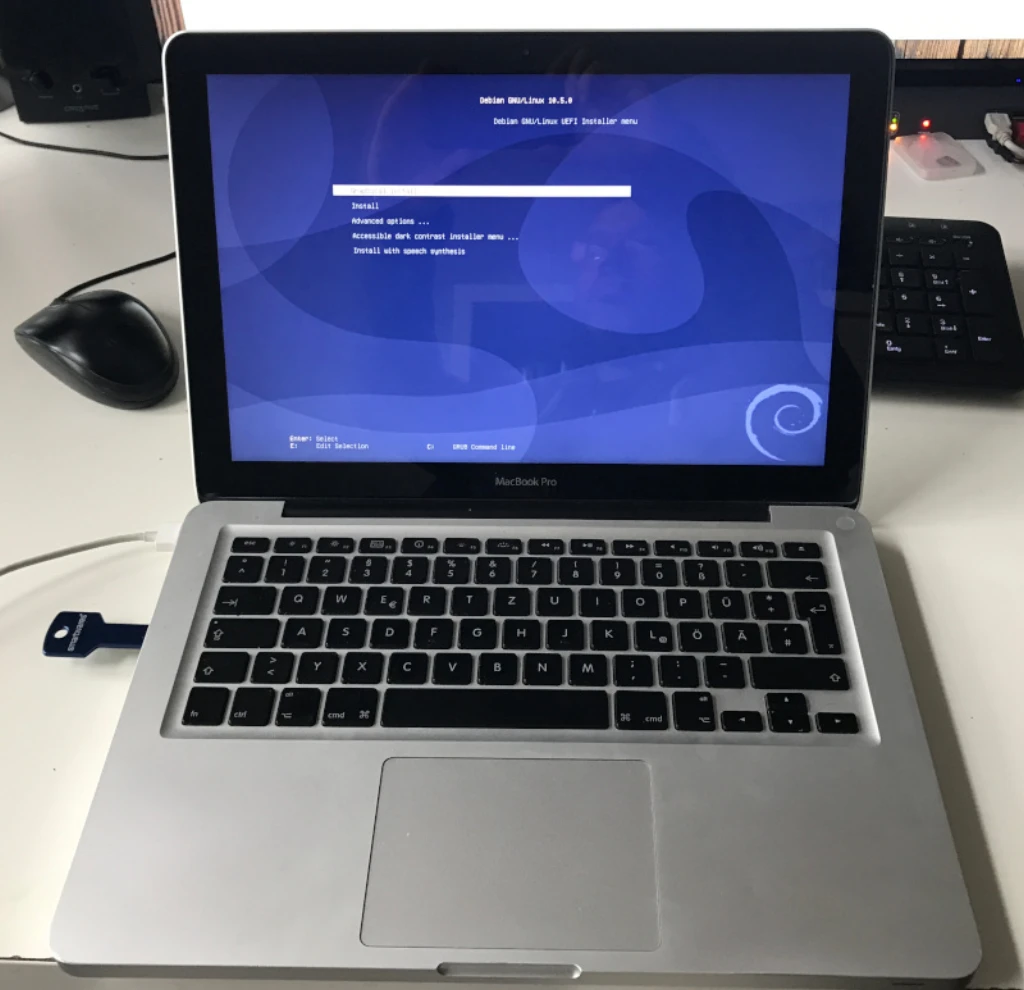
I’ve tried both, the graphical and the text-oriented installer and recommend the second. In the graphical one the touchpad is not recognised and so you have to use tab and cursor keys to navigate through the options.
An Ethernet cable should be connected during the installation process due to the fact that the Broadcom WLAN module is not recognised. I could have supplied the driver in the form of another USB stick but since I have a special installation sequence anyway, I decided to install everything afterwards.
Since we don’t have a server here and a sufficiently dimensioned SSD I’ve used the assisted partition on one disk.
Much more important is a clutter-free Debian. Therefore do not select any Desktop Enviroment in the selection of features. The only checkmark should be set on “Standard System Utilities” when prompted to.
After the installation, the Mac boots into a new operating system. At first, deliberately into the console without any graphical user interface. The process continues with root. All subsequent commands can either be entered or loaded as a script from my server with wget (Click here for the direct Link):
# wget https://blog.jakobs.systems/img/macbook-linux.sh
After downloading and…
# chmod +x macbook-linux.sh
…the script can be started. But first let’s see what it does:
GNOME without Clutter
With the following line we get a minimal Gnome with the most important standard applications:
# apt install file-roller bijiben gthumb seahorse gnome-core gnome-clocks gnome-calendar gnome-calculator gnome-characters gnome-sound-recorder gnome-screenshot gnome-dictionary flatpak gnome-software-plugin-flatpak gnome-todo gnome-maps network-manager-openvpn-gnome system-config-printer ffmpeg cups printer-driver-all simple-scan foomatic-db gnupg hunspell-de-de vlc firefox-esr-l10n-de webext-ublock-origin cifs-utils gnome-power-manager laptop-mode-tools -y
Broadcom Wifi Driver
The built-in wifi module in my Mid-2009 MacbookPro 13" requires a proprietary Broadcom B43 driver. We download this together with the package fwcutter via wget straight from the Debian server. If you have a different Mac, please check first which module Apple has installed. Macbook Pro devices before the year 2009 for instance use an Atheros chipset9.
# wget http://ftp.de.debian.org/debian/pool/contrib/b/b43-fwcutter/firmware-b43-installer_019-4+deb10u1_all.deb && wget http://ftp.de.debian.org/debian/pool/contrib/b/b43-fwcutter/b43-fwcutter_019-4+deb10u1_amd64.deb && dpkg -i *.deb
Current Libreoffice
The Debian software repositories always lag behind the current version numbers of the applications. This is due to the rather conservative and stability-oriented selection which I appreciate. Nevertheless, I would like to use the latest release of certain desktop apps. That’s why we don’t get Libreoffice from the standard repositiory but instead via flatpak:
# flatpak remote-add flathub https://dl.flathub.org/repo/flathub.flatpakrepo && flatpak install flathub org.libreoffice.LibreOffice -y
Wrapping up
Last but not least, we remove unneeded programme packages such as the Chromium browser, which should not be used from the Debian Default Repositories. End users are also unlikely to come into contact with vim. A cleaned interfaces file should not be missing in order to get the wifi work:
# apt purge chromium xterm vim -y && apt autoremove -y && mv /etc/network/interfaces /etc/network/interfaces.backup && echo "source /etc/network/interfaces.d/*" >> /etc/network/interfaces && echo "auto lo" >> /etc/network/interfaces && echo "iface lo inet loopback" >> /etc/network/interfaces
A final reboot follows, this time into the graphical user interface and the user specified during the basic installation. After logging in, you can now customize your GNOME Desktop, connect to a Nextcloud, add printers and SMB shares or import an openVPN profile to connect to a remote network.
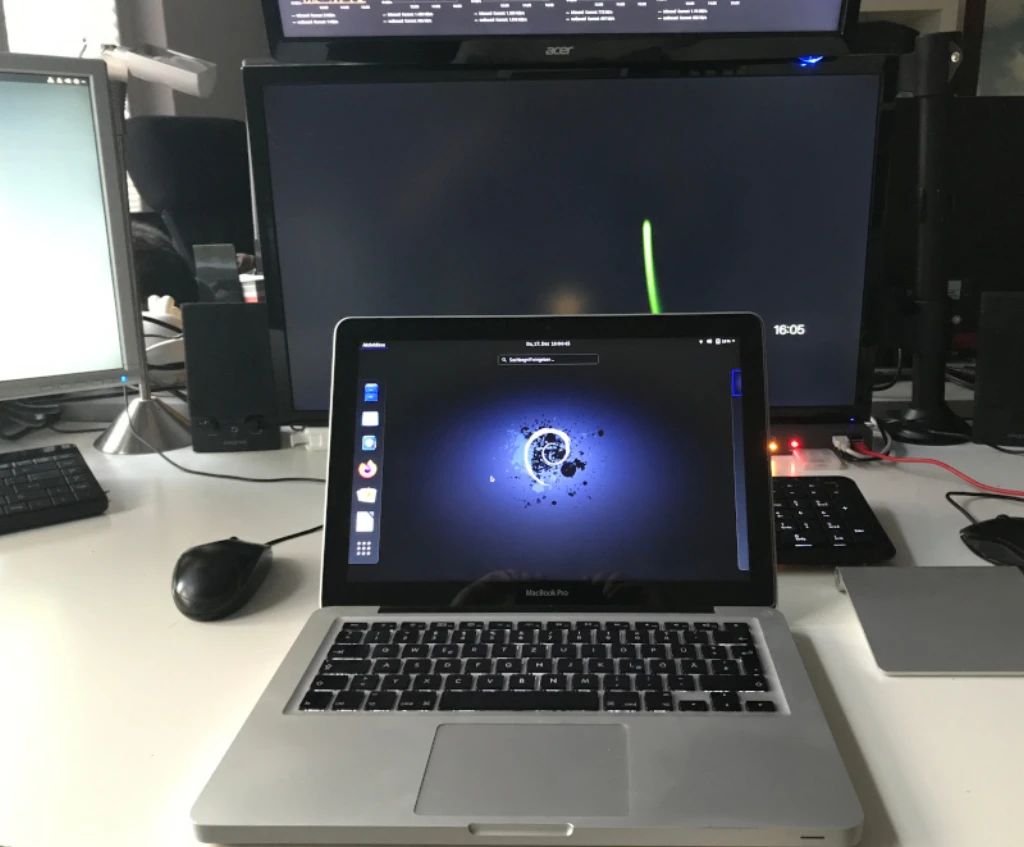
As far as I am concerned, all hardware components are recognised perfectly. I was able to conduct a BBB video conference call without any problems using the internal iSight webcam and microphone. One thing I find very pleasant about the Apple hardware: The buttons for dimming the display and the keyboard backlight seems to be controlled directly via the ROM Firmware independently of the operating system ontop. In any case, the overlay is exactly the same as on a macOS.
The 11-year-old Macbook Pro is awakening to a second life. Surely it will last a few more years. I wonder why I didn’t find the time to install a Linux on it until today.
Stay Healthy and keep distance,
Tomas Jakobs